
Surgical Data Acquisition
Pre-Surgery Data Acquisition | Surgical Data Acquisition | Surgical Temporary Delivery | Restorative Data Acquisition | Final Delivery
Pre-Extraction Scan
The instructions describe the process of scanning a patient's arch before an extraction procedure. It is important to ensure that a scan marker is present during this scan, as well as the final surgical scan, to ensure accuracy in the file merging process.
There are various options for markers, including a tooth, Stricker screws, FI3LD Orientation Scan Marker®, Yomi bone link, or a bone reduction guide. The choice of marker may differ depending on the specific needs of the patient and the procedure being performed.
Regardless of the marker used, the scanning technique remains the same. The marker serves as a reference point during the scan, allowing for precise and accurate merging of the files.
-
The instructions describe the process of placing a scan marker in a patient's mouth for a dental scan. The scan marker is used to help merge the pre-design scan to the surgical scan.
To begin the process, a 6mm scan marker is used for the palate area. Position a STV tray® in the patient's mouth. The tray should fit comfortably and passively.
While the tray is still in the patient's mouth, a spot is marked in the middle of the palate about 5mm away from the tray. This spot should not be too deep in the throat to provide patient comfort. This is where the scan marker will be anchored to the palate.
Next, a hole is pre-drilled using a 2.0 burr. The Orientation Scan Marker® is then hand torqued with a multi-unit driver, which is the same tool used to place straight multi-unit abutments.
It is important to make sure that the scan marker is safely placed in the palate and is not moving to ensure accurate merging of the scans.
For a lower arch, use a 6mm Orientation Scan Marker® in the posterior region or a 12 mm Orientation Scan Marker® in the anterior region.
| Universal Scan Bodies®
The instructions describe the steps for using a universal scan body for scanning the upper/lower jaw in a dental procedure. The first step is to place the scan body onto the scan marker, making sure to position the head of the scan body with the slot facing the user. It is important to note that the scan body can be seated in six different positions, so choosing the correct position is crucial for accurate scanning.
To facilitate the scan, it is recommended to add bite registration material between the body of the scan body and a few anterior teeth. However, it is important not to cover the scan surface of the scan body to ensure accurate data collection.
Additionally, it is recommended to remove the AI (artificial intelligence) function in the IOS to facilitate the scan of this type of case more easily.
Once everything is set up, the user is ready to scan the upper/lower jaw. However, it is important not to over-scan the patient, as this can introduce inaccurate data. When the scan is complete, the user can choose to leave or remove the scan body. If the scan body is removed, it must be repositioned in the exact original position to ensure accurate alignment of the scans.
It is crucial not to move or remove the FI3LD Orientation Scan marker until all scans are completed to ensure accurate data collection.
-
The instructions describe the use of Stryker Screws as a potential marker for dental scanning. If Stryker Screws are chosen as the marker, it is recommended to use a minimum of three screws to ensure accuracy.
It is important to note that Stryker Screws are small and may not always be easy to see in a bloody environment. However, their location is not crucial as long as they do not interfere with the planned implant placement and are easy to reach with the scanner.
By using Stryker Screws as a marker, the dentist or surgeon can ensure accurate imaging of the patient's implant location.
-
The instructions describe the importance of leaving a stable tooth behind. It is important to ensure that the tooth is not movable, as any movement during the scan could cause inaccurate alignment of the scans.
Additionally, it is important to consider the placement of the tooth in relation to the planned implant placement. If the tooth is in the way of the implant, it may need to be removed instead. If leaving a tooth behind is necessary, it is recommended to choose a tooth located as far in the posterior region as possible to minimize interference with the implant placement.
However, if it is necessary to leave a tooth in the anterior region, an open flap technique for scanning may be required.
-
The instructions describe the use of a bone reduction guide as a point of reference during a dental scan. If a bone reduction guide is used, there is no need for any other scan markers. The Bone reduction guide has enough surfaces to provide sufficient reference points for the scan. It is important to know that this technique is our least favorite as it can be quite technique sensitive.
However, if the patient is edentulous, an orientation scan marker must be placed in the middle of the palate through the denture. For a lower arch the scan marker needs to be placed in the posterior region of the ridge or right between 24 and 25. This marker serves as a reference point for the scan.
To begin the process, the bone reduction guide is placed in the patient's mouth before any extractions takes place. The patient is then scanned, ensuring that the scan captures the teeth, the bone reduction guide, and palate for an upper arch.
Once the scan is completed, the extractions can be performed.
-
The instructions describe the use of the Yomi bone link as a point of reference during a dental scan. If the Yomi bone link is used, there is no need for any other scan markers. The Yomi bone link has enough surfaces to provide sufficient reference points for the scan.
However, if the patient is edentulous, an orientation scan marker must be placed in the middle of the palate through the denture. This marker serves as a reference point for the scan.
To begin the process, the Yomi bone link is placed in the patient's mouth before any extractions take place. The patient is then scanned, ensuring that the scan captures the teeth, the Yomi bone link, palate, and vestibules.
Once the scan is complete, the extractions can be performed. The use of the Yomi bone link and orientation scan marker provides accurate reference points for the scan.
Surgical Scan
| Suture Caps


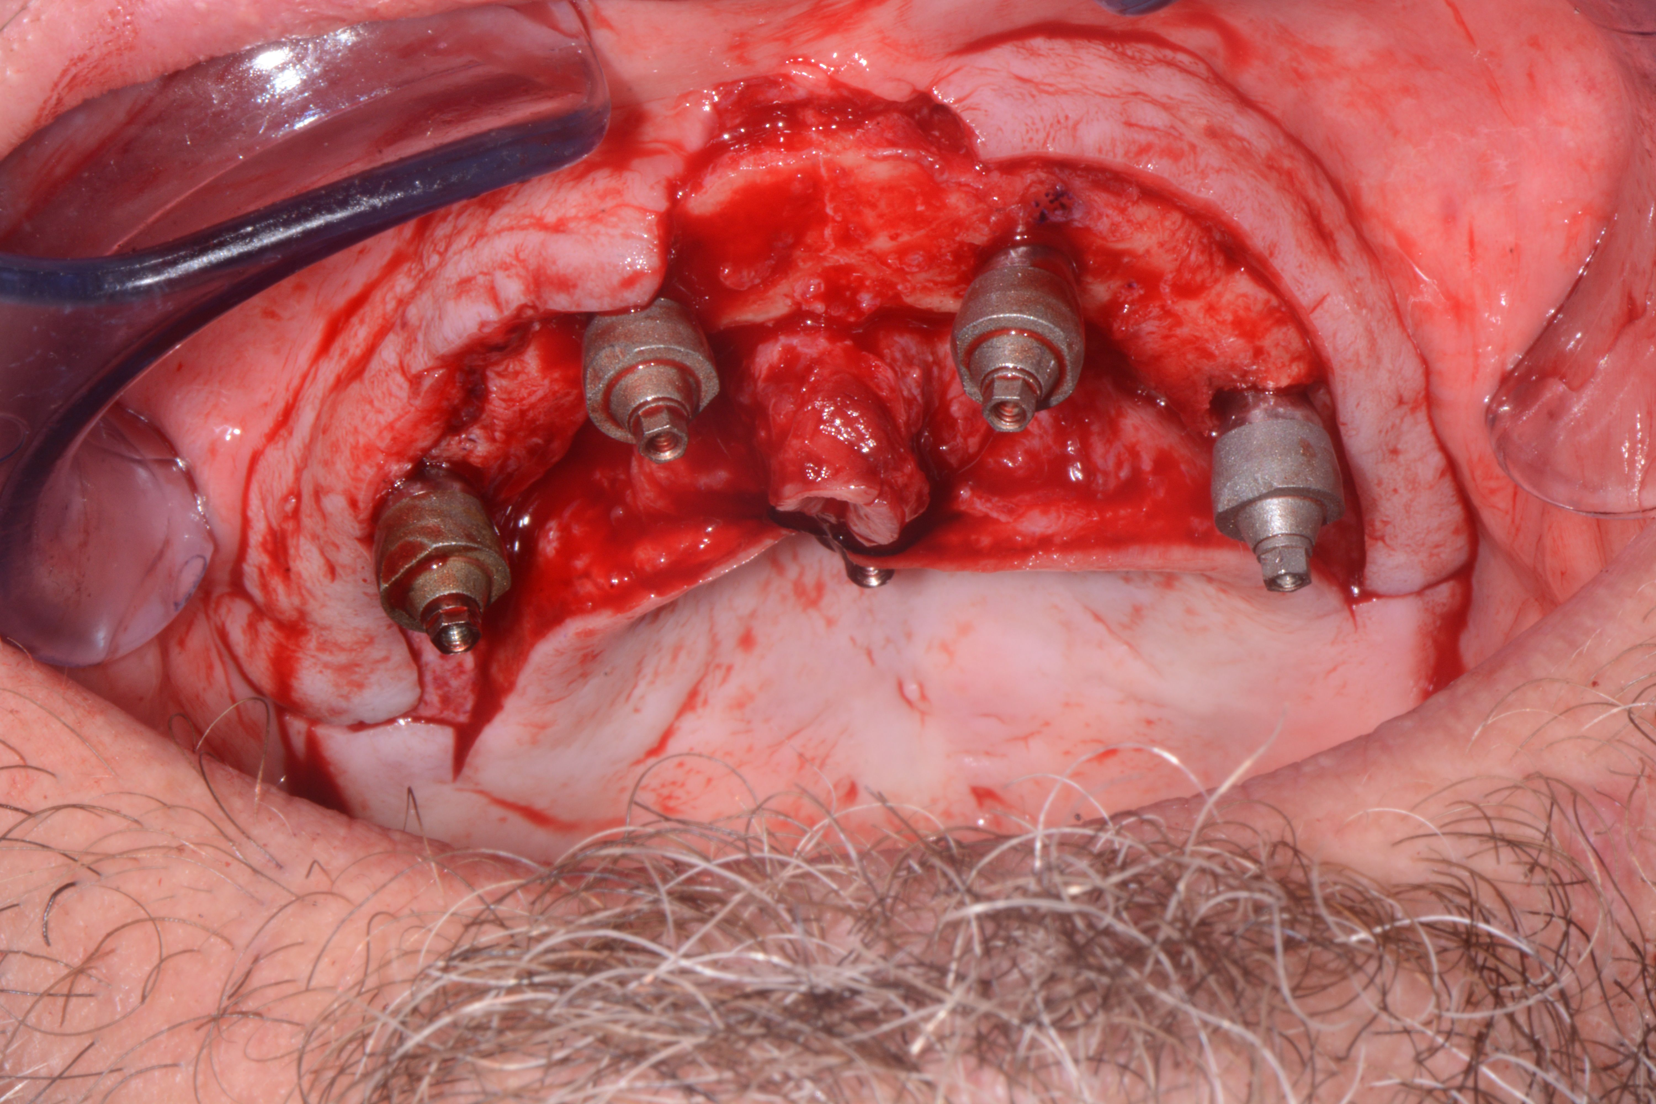
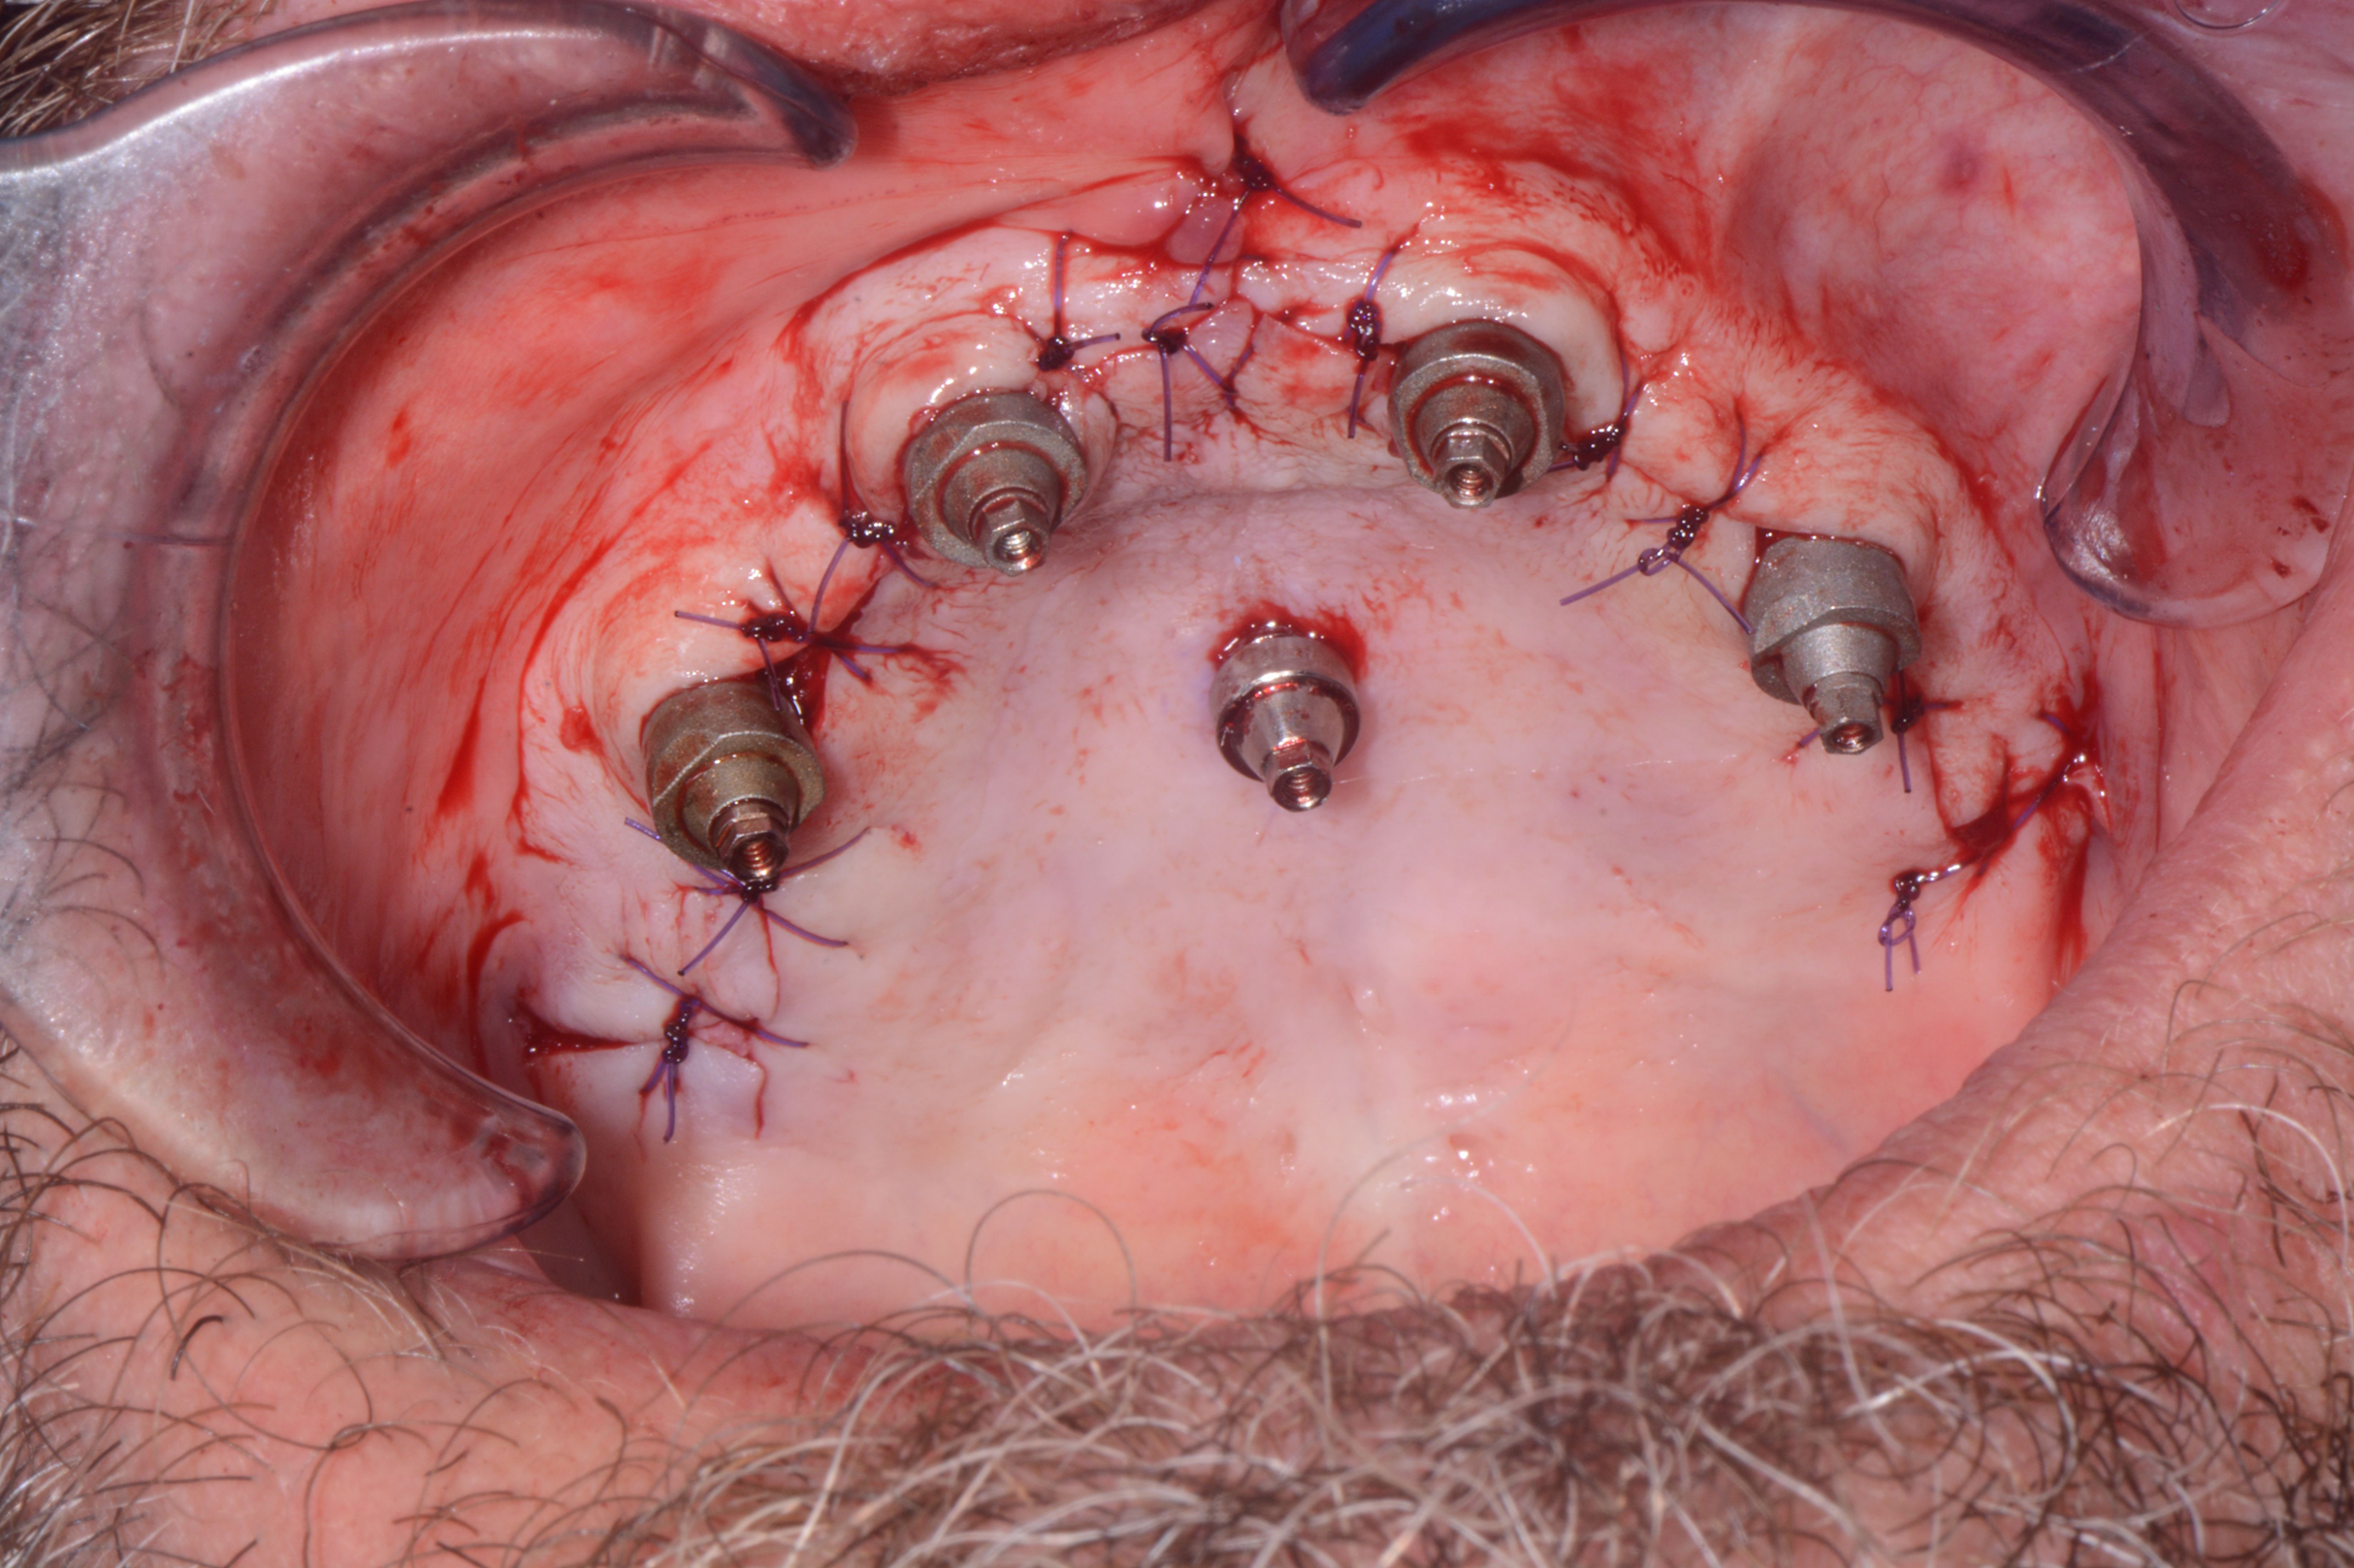
Firstly, the suture caps are placed over the MUA/SRA using a straight multi-unit driver. It is important to hand-tighten the caps while ensuring that they are flush with the MUA/SRA surface.
Once the caps are in place, the next step is to suture around the caps. The suture caps must be exposed and should not be covered by any tissue.
During this step, managing the tissue around the area is important to ensure that the sutures are placed correctly. FI3LDDS Suture Caps® used in this procedure are specifically designed to facilitate the delivery of the temporary.
| Universal Scan Bodies®
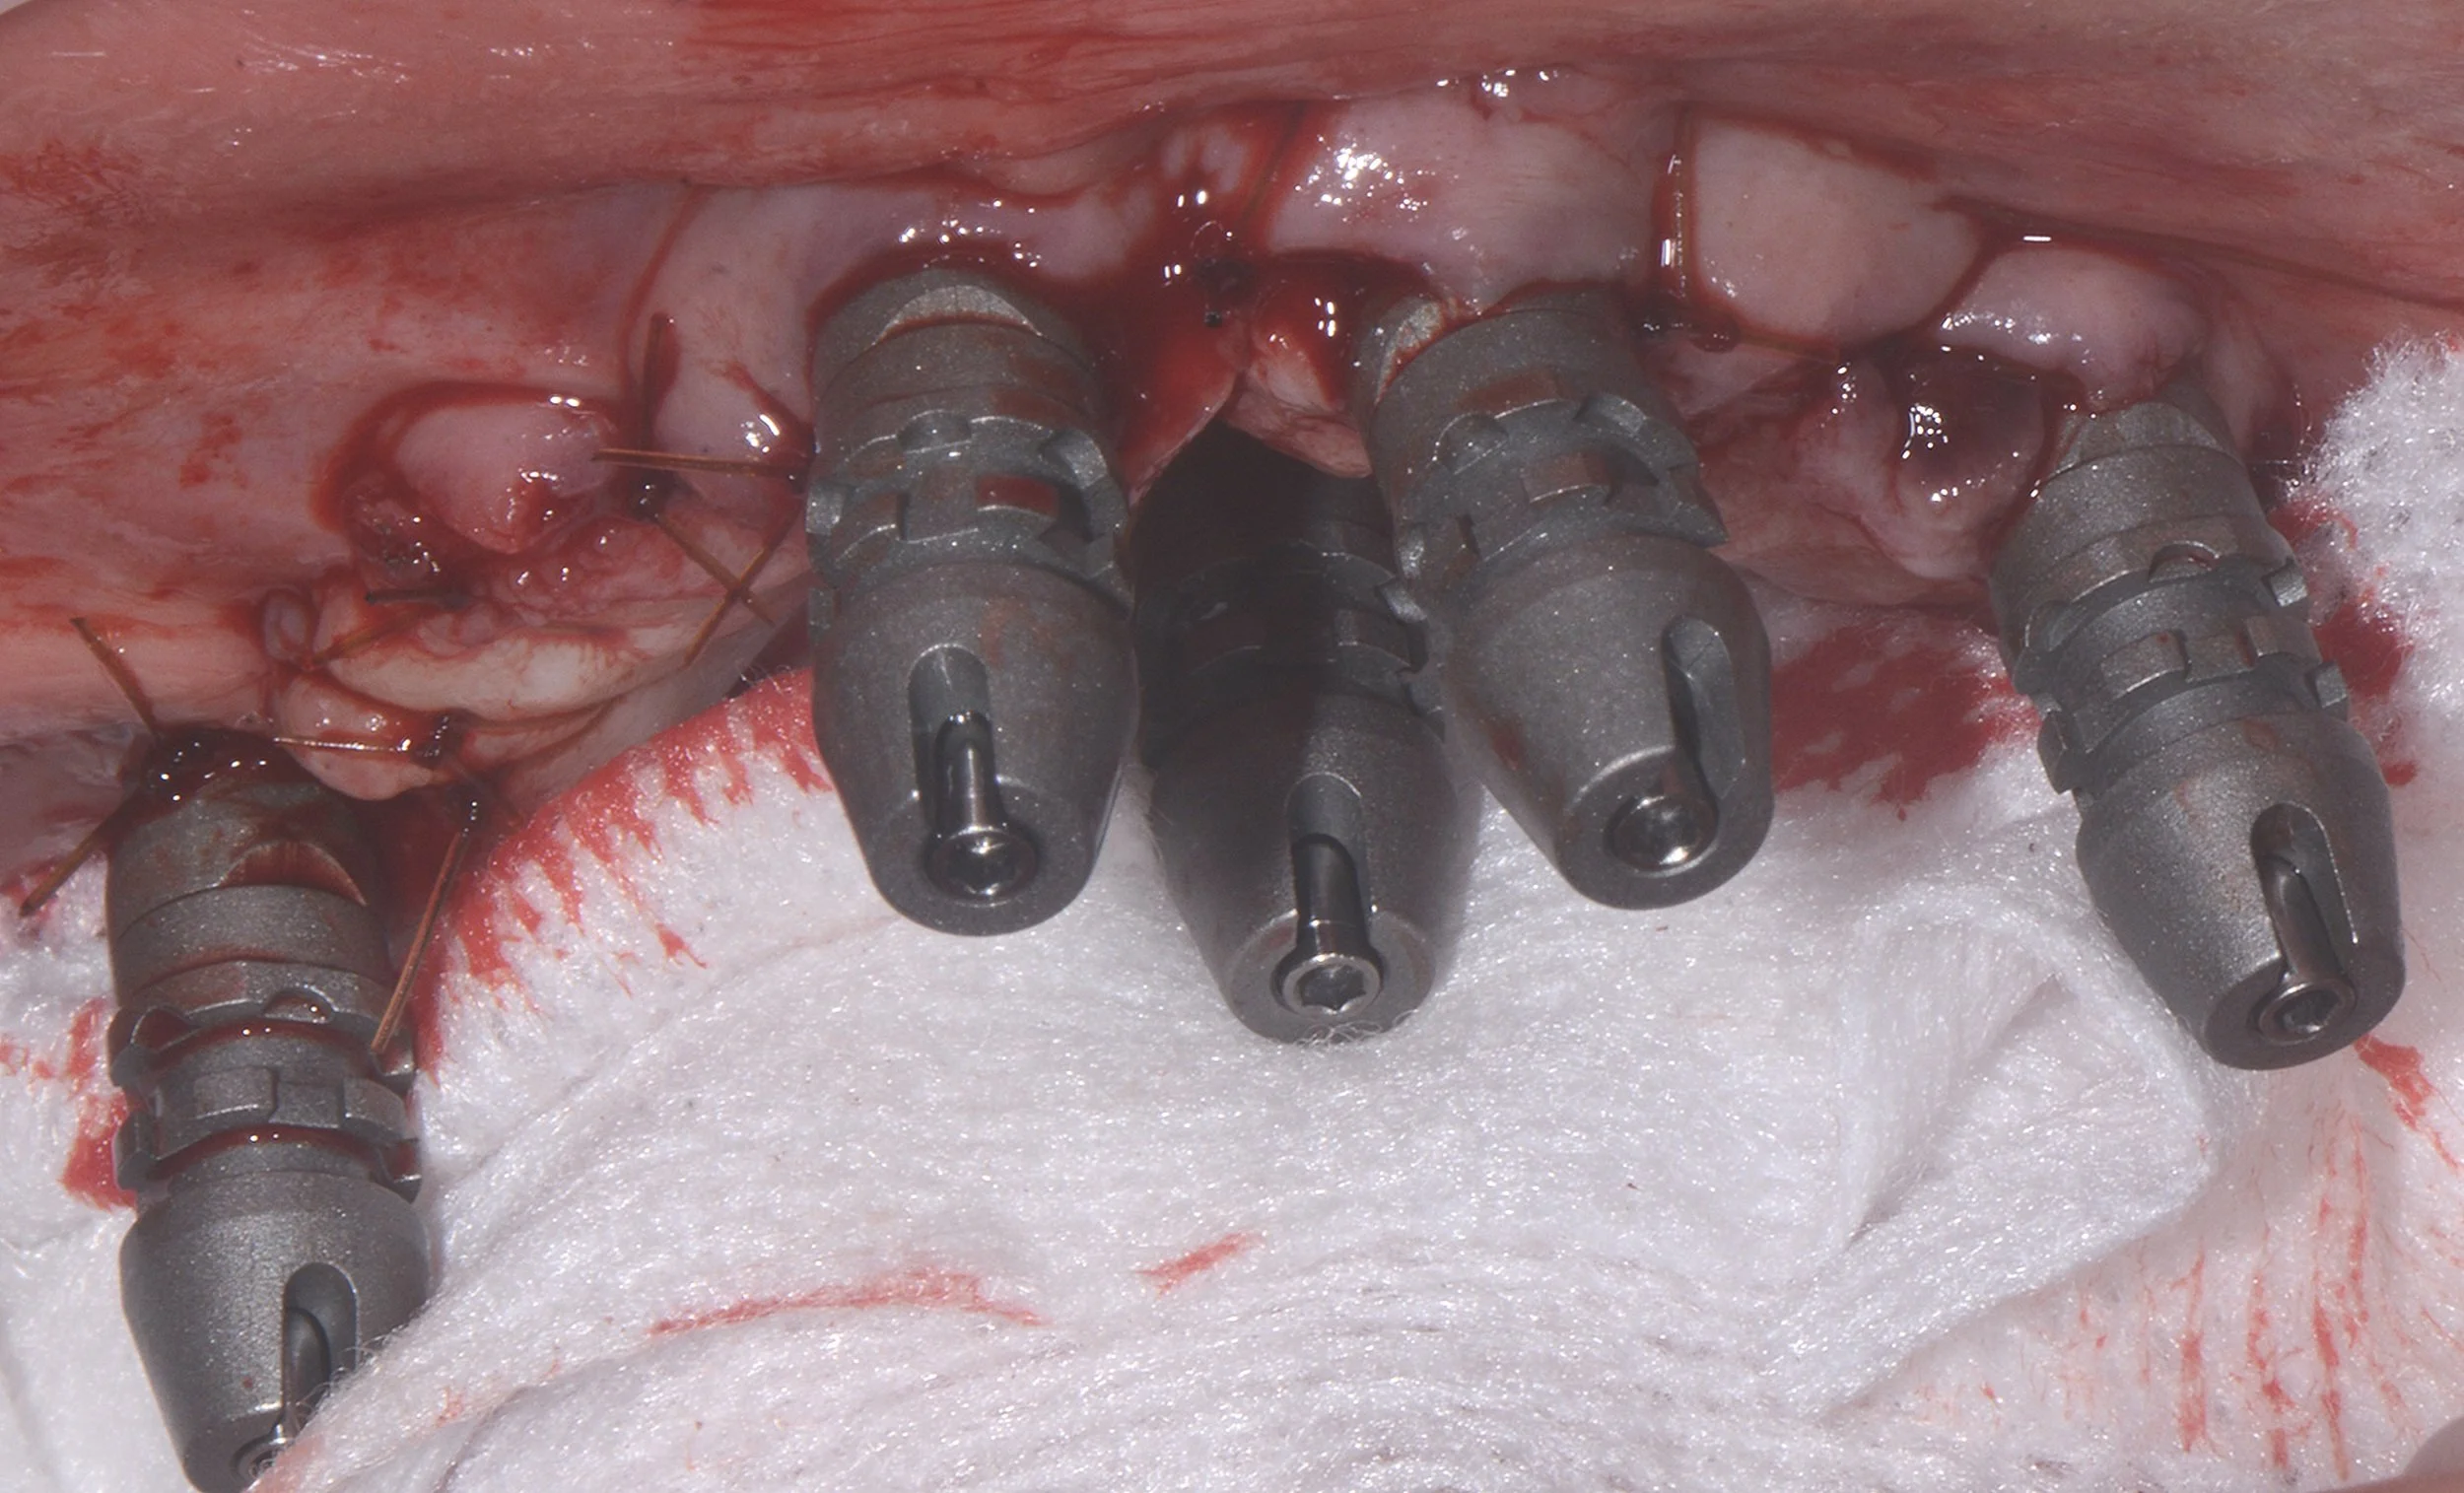
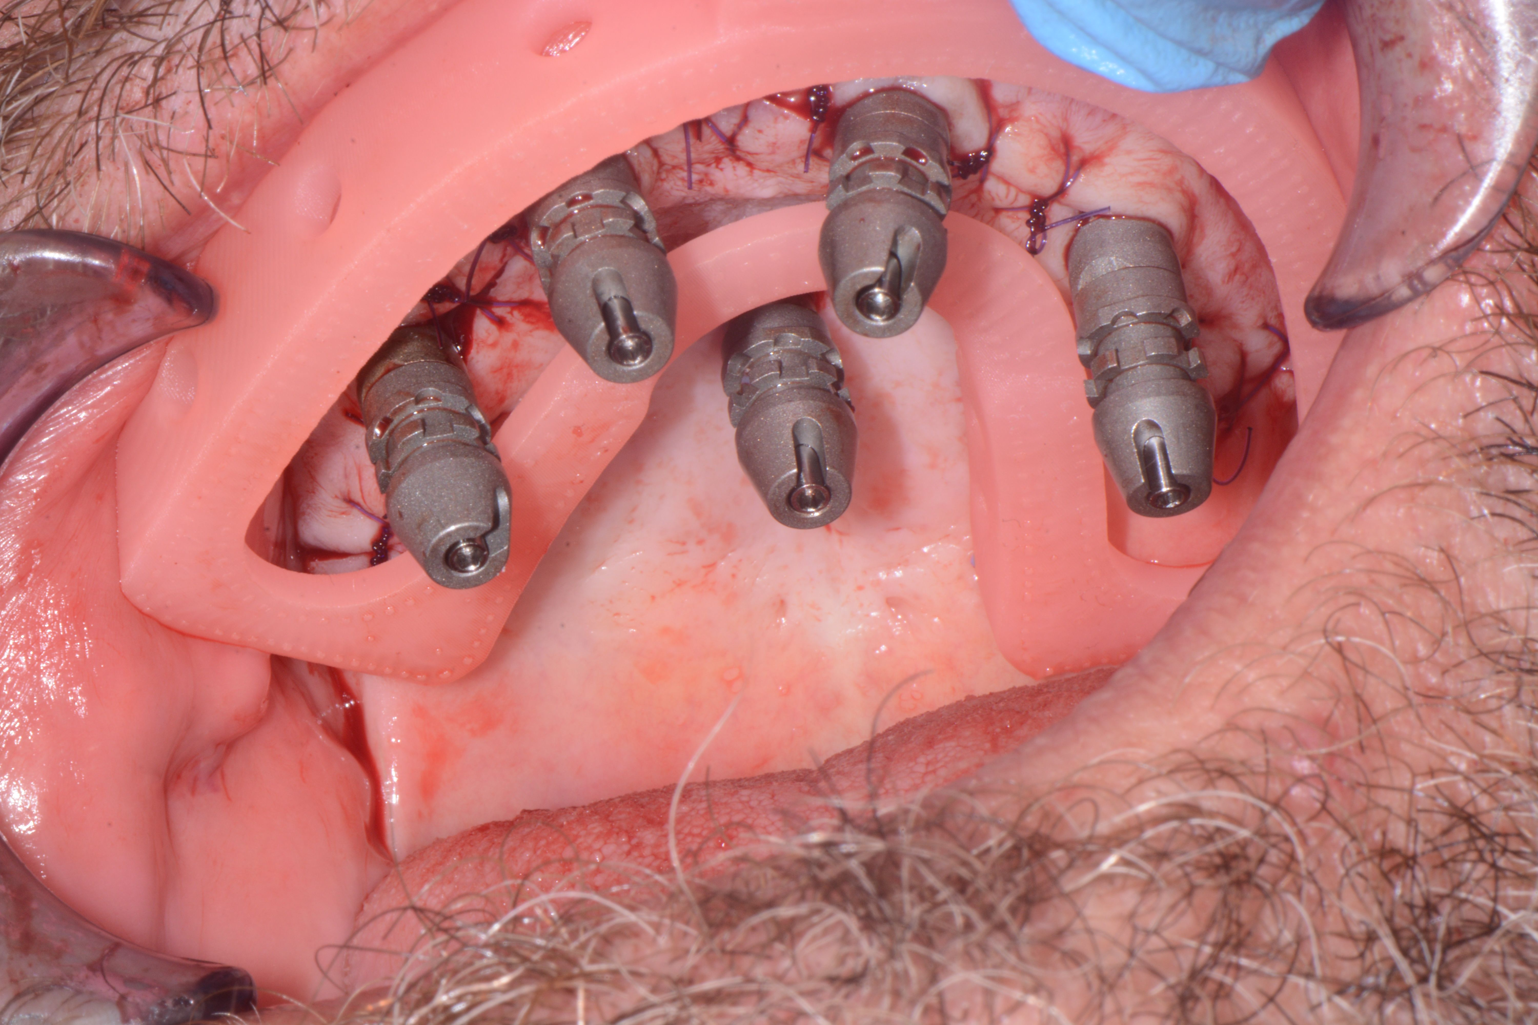
Place the FI3LDDS Universal Scan Bodies® on the suture cap and screw them using a 050-driver applying finger tight pressure. Make sure that the scan bodies are seated flush with the suture cap.
The FI3LDDS Universal Scan Bodies® are hexed, but for this step can be positioned in any direction.
| STV® Tray
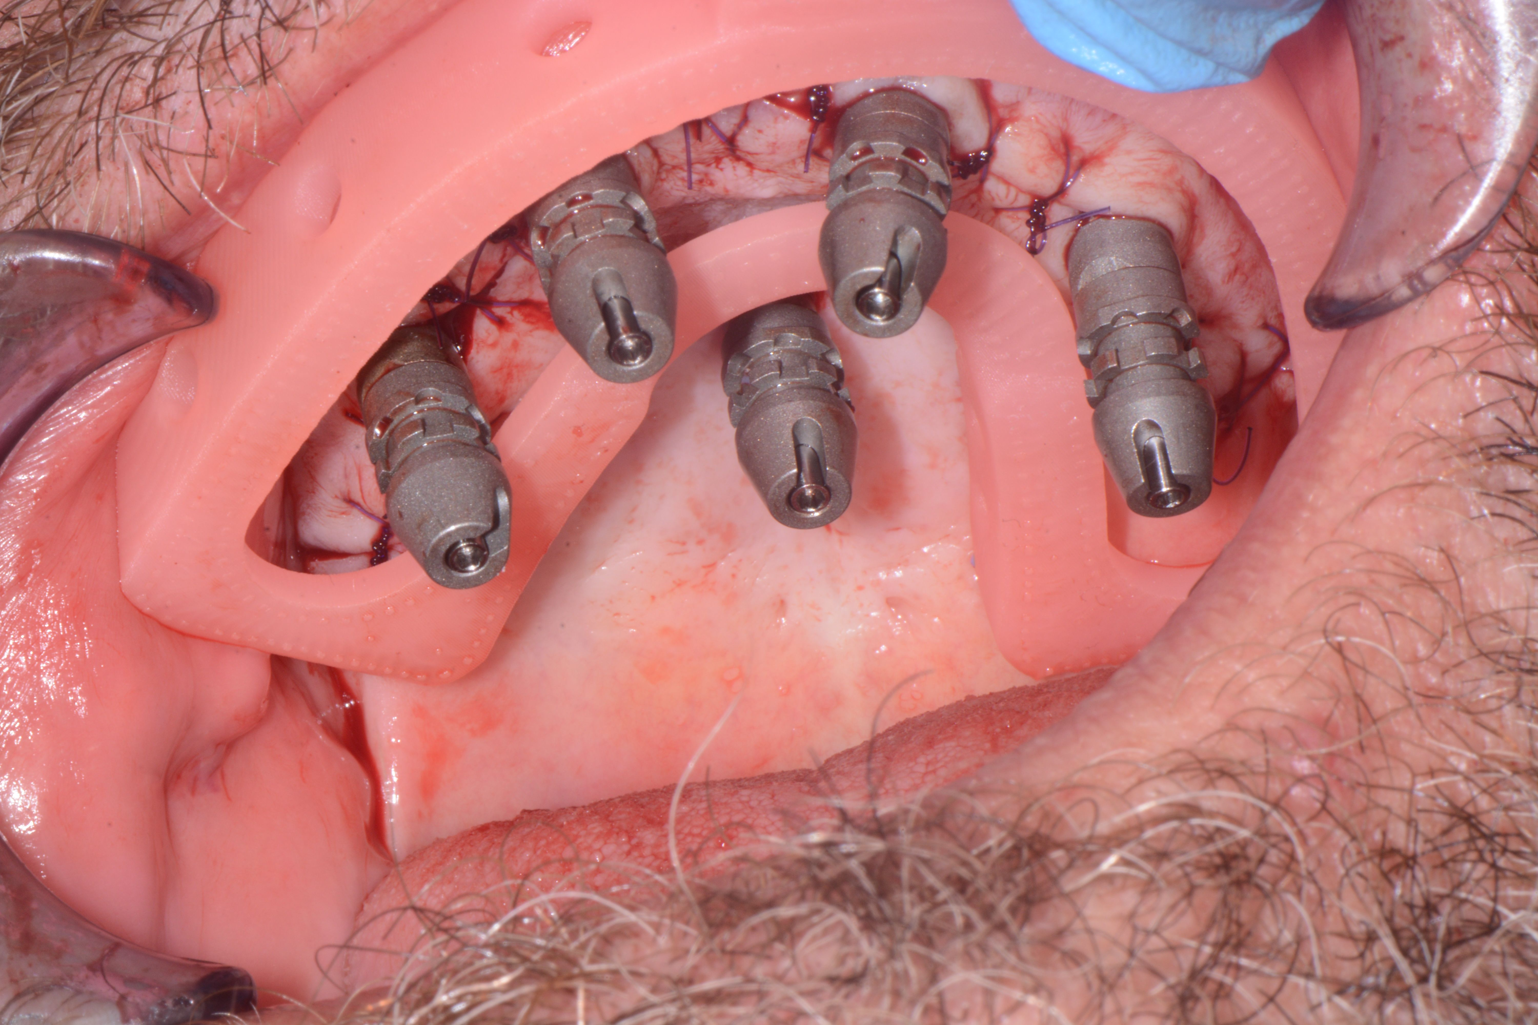
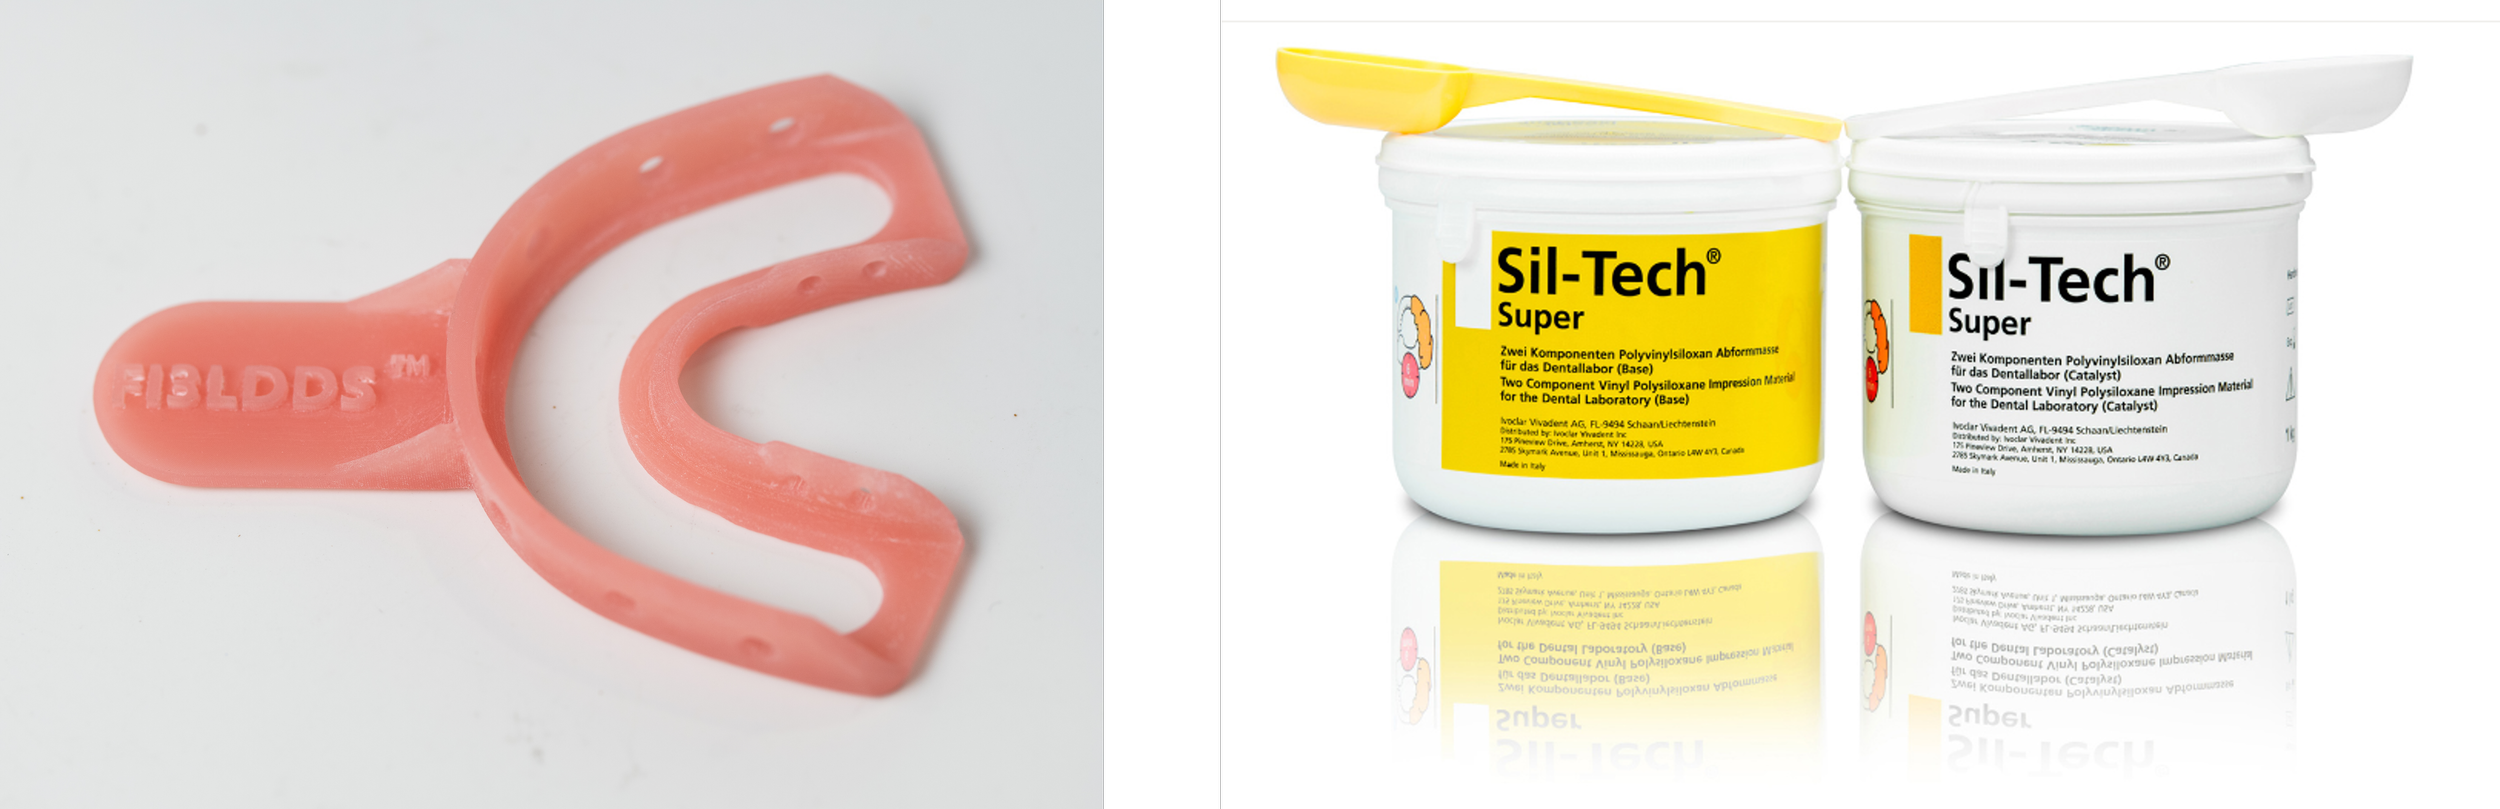
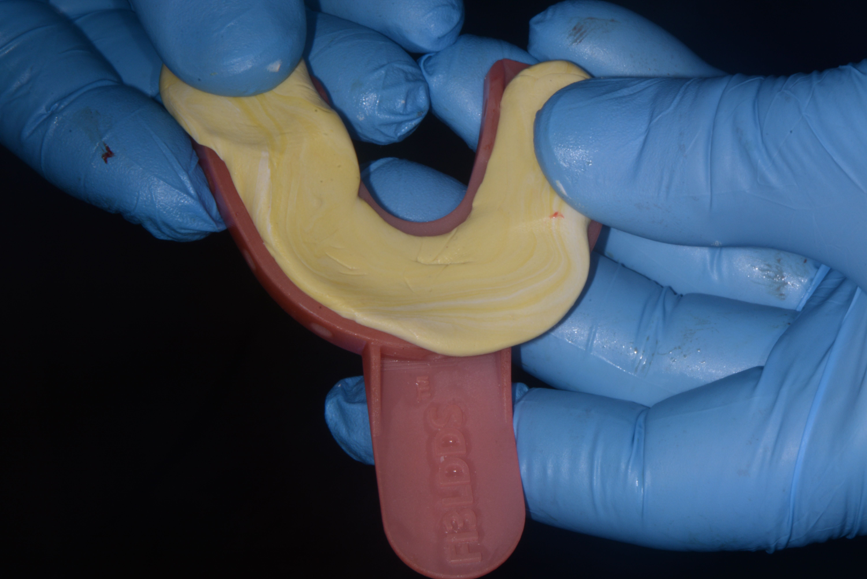
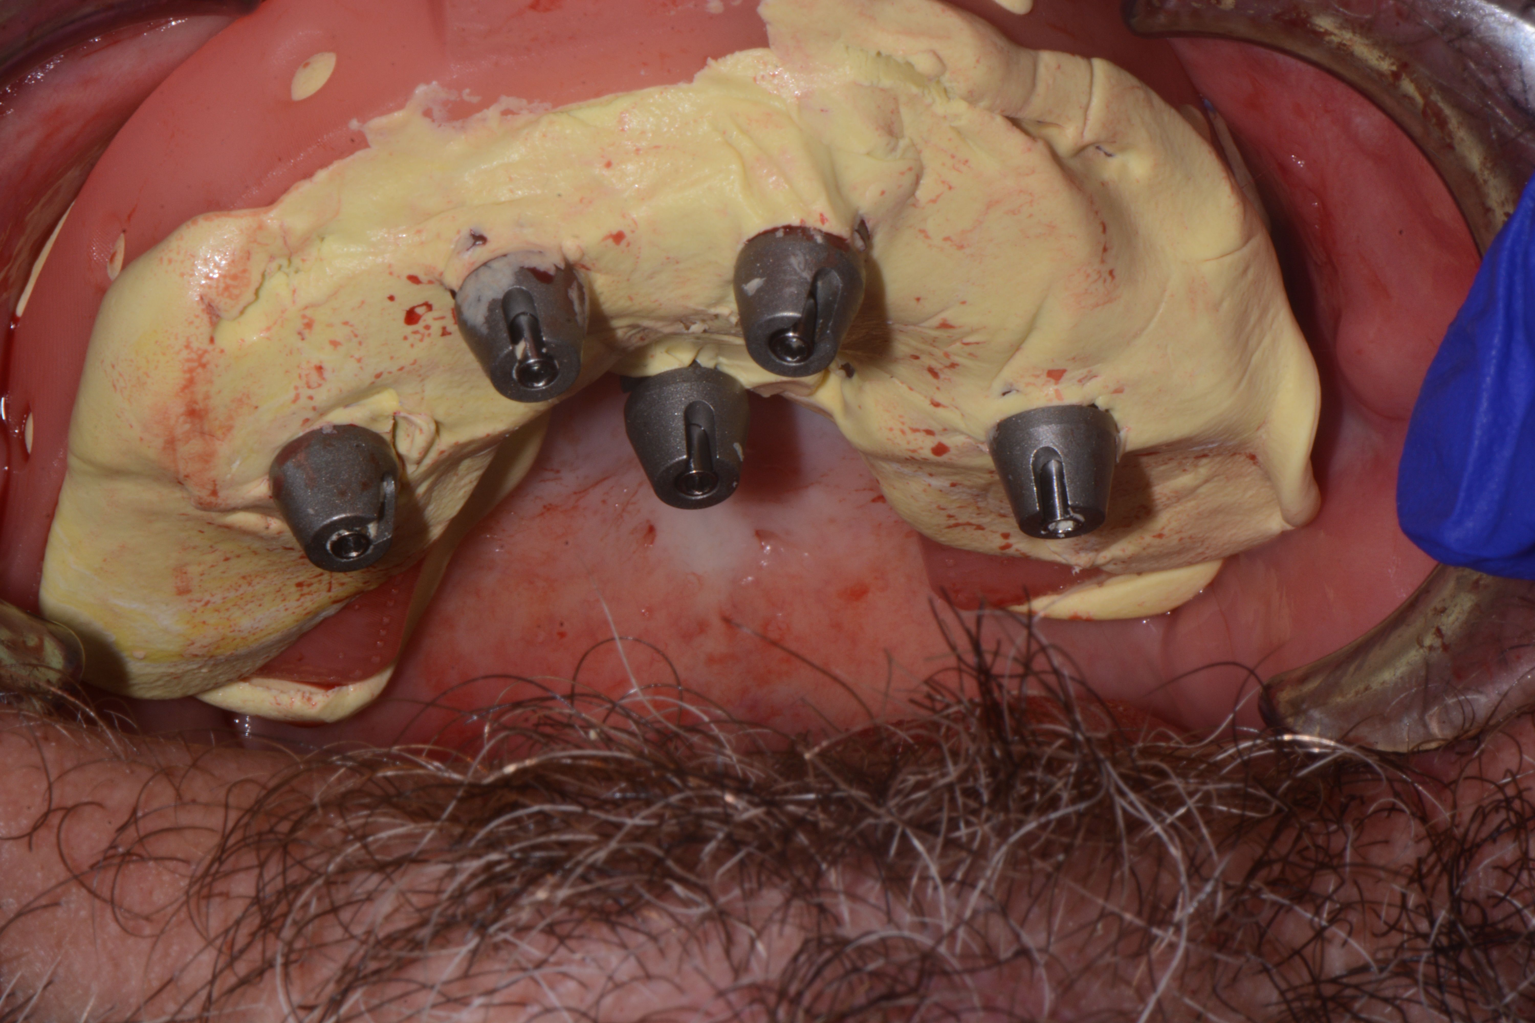
The tray is a patent protected custom-made device that is designed to hold multiple scan bodies, while keeping at bay blood, saliva, blood clots, and any other debris away from the scanning area, while scanning the patient's implants position and the soft tissue under compression.
The first step is to place the tray in the patient's mouth, ensuring that each scan body is positioned correctly and protruding through the channel of the tray. The channel is a narrow groove or opening in the tray that provides a clear path for the scan bodies to extend through without any obstruction or interference.
If any of the scan bodies are obstructed or interfere with the tray, it may be necessary to enlarge the channel to allow for easier access. This can be done by carefully grinding away some material from the tray, while being mindful not to damage the integrity of the tray or compromise its fit.
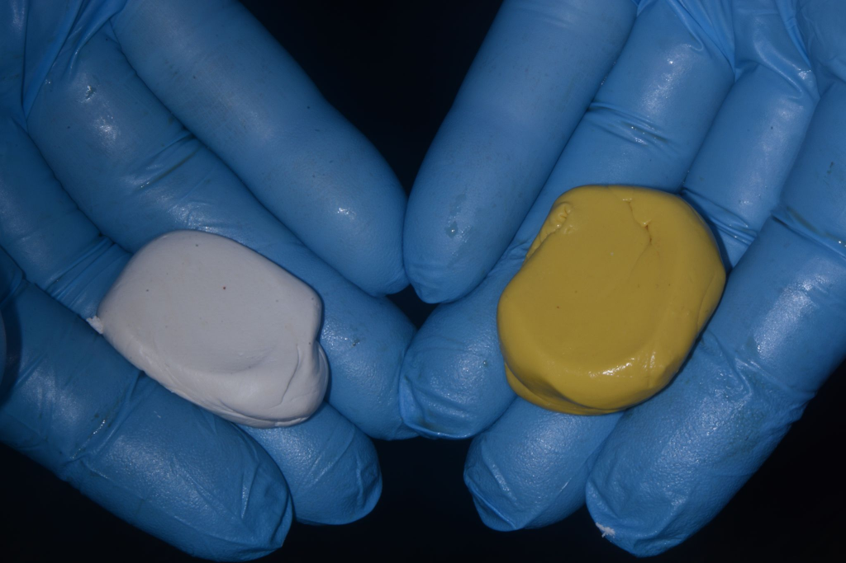
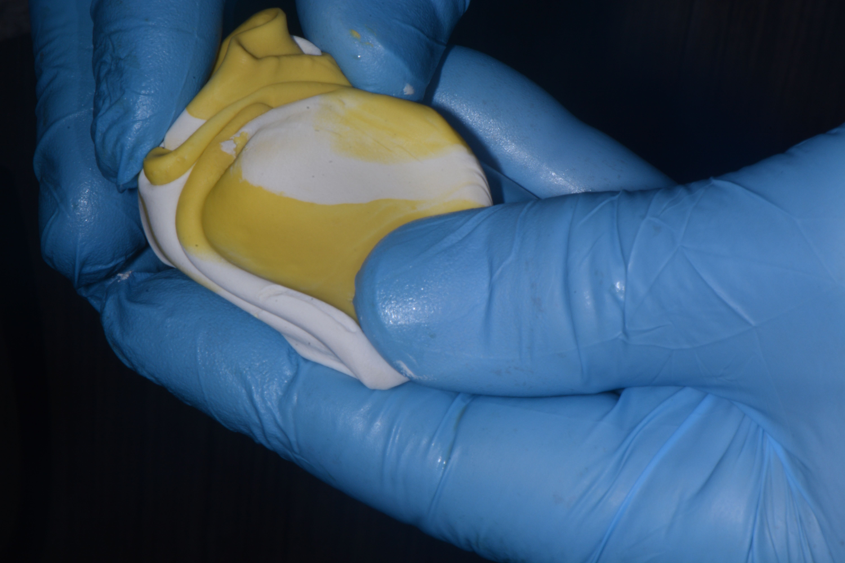
Once satisfied with the fit of the STV tray, dental putty material is mixed and applied to the tray.
The tray is then repositioned in the patient's mouth, and pressure is applied to ensure that the scan bodies protrude through the putty material and the tray's channel. Any excess putty material is removed and/or pushed back into the channel using a dental instrument to clear the scan body heads.
Make sure that the scan marker of your choice is not covered by the tray or any putty material.
To aid in the IOS scanning process, lines or geometrical shapes are created on top of the putty material. This is important to provide reference points for the scanner and ensure accurate and detailed images of the scan Bodies.
Before scanning, it is essential to ensure that all scan body heads are clear of any putty material or debris. Any blood or other fluids are removed from the scan bodies using a surgical suction and 2x2 gauze.
It is important to avoid using air to clean the scan bodies as this can cause subcutaneous emphysema.
| Scanning The Implant Position
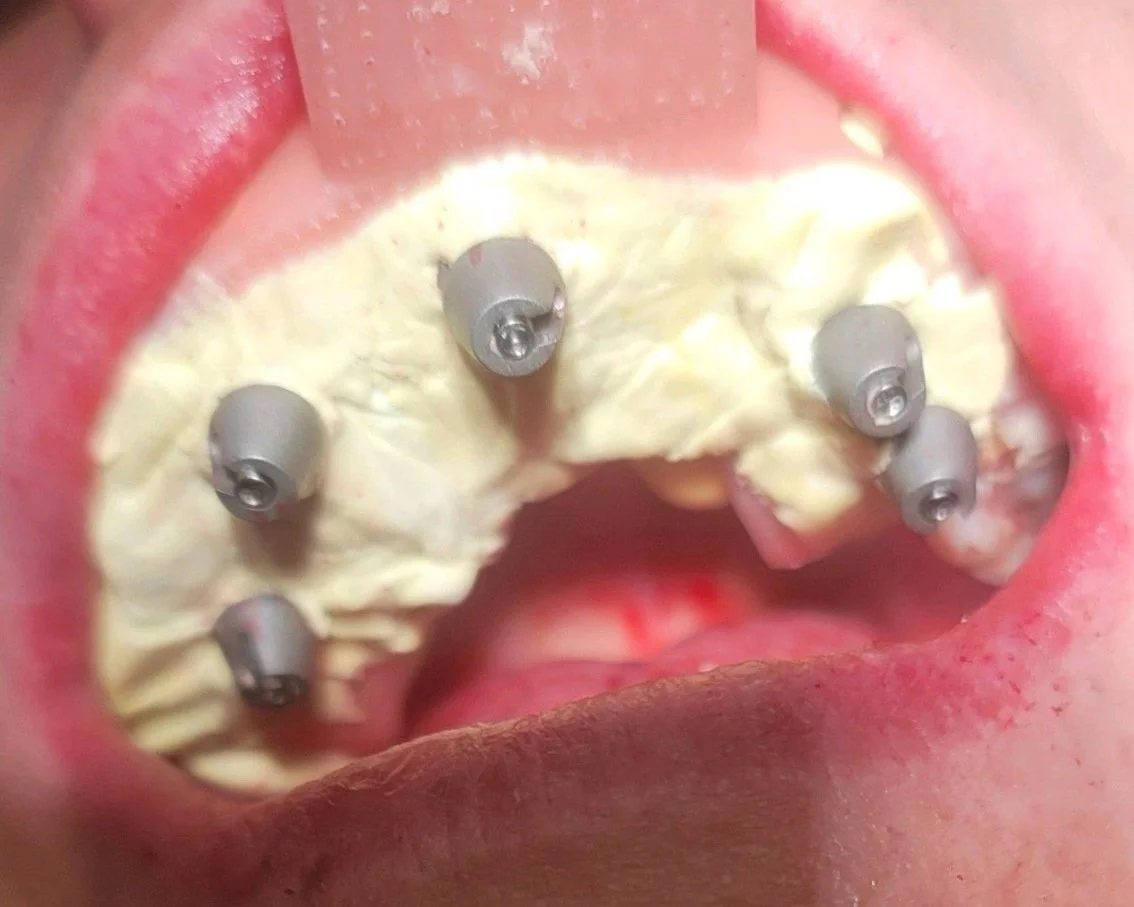
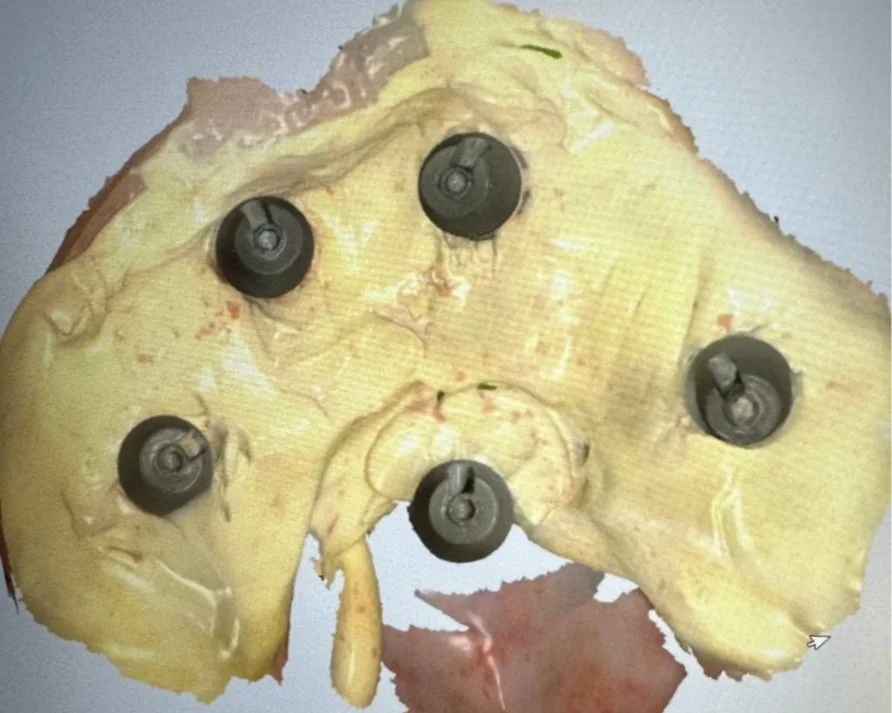
To take a clear digital impression in the patient’s mouth, you need to prepare the area properly. This means removing any moisture, blood, or debris to get an accurate scan.
It's also important to clean and dry the lens on the intraoral scanner wand and remove any overhead lighting from the scanning area.
To make the scanning process easier, disable the Artificial Intelligence function.
Start by scanning the occlusion surface from left to right or right to left, then lingually, and then facially. Finally, go over each scan body, but don't over-scan, as it can create inaccurate data. do not forget to scan the right and left sides of the tray
The scan bodies were designed for easy scanning, so you don't need to waste time scanning unnecessary landmarks. Only scan the scan bodies, the scan marker as discussed to get the best results and the right and left sides of the STV tray.
It is crucial that you do not forget to scan the scan marker of your choice during the scanning process. The scan marker helps the lab align all the scans correctly, and failing to include it would be detrimental to the success of the case. If the scan marker is not included, it can seriously complicate the fabrication process and delay the timely delivery of the surgical temporary. Therefore, it is important to take the time to ensure that you have scanned the scan marker along with the other scan bodies to avoid any complications in the fabrication process.
The Intra-Oral Scanners listed below have been vetted for the FI3LDDS Workflow®.
3Shape TRIOS 3-5
CEREC Prime
iTero Element & 5D
Medit i700Medit i500
| Scanning The Soft Tissue
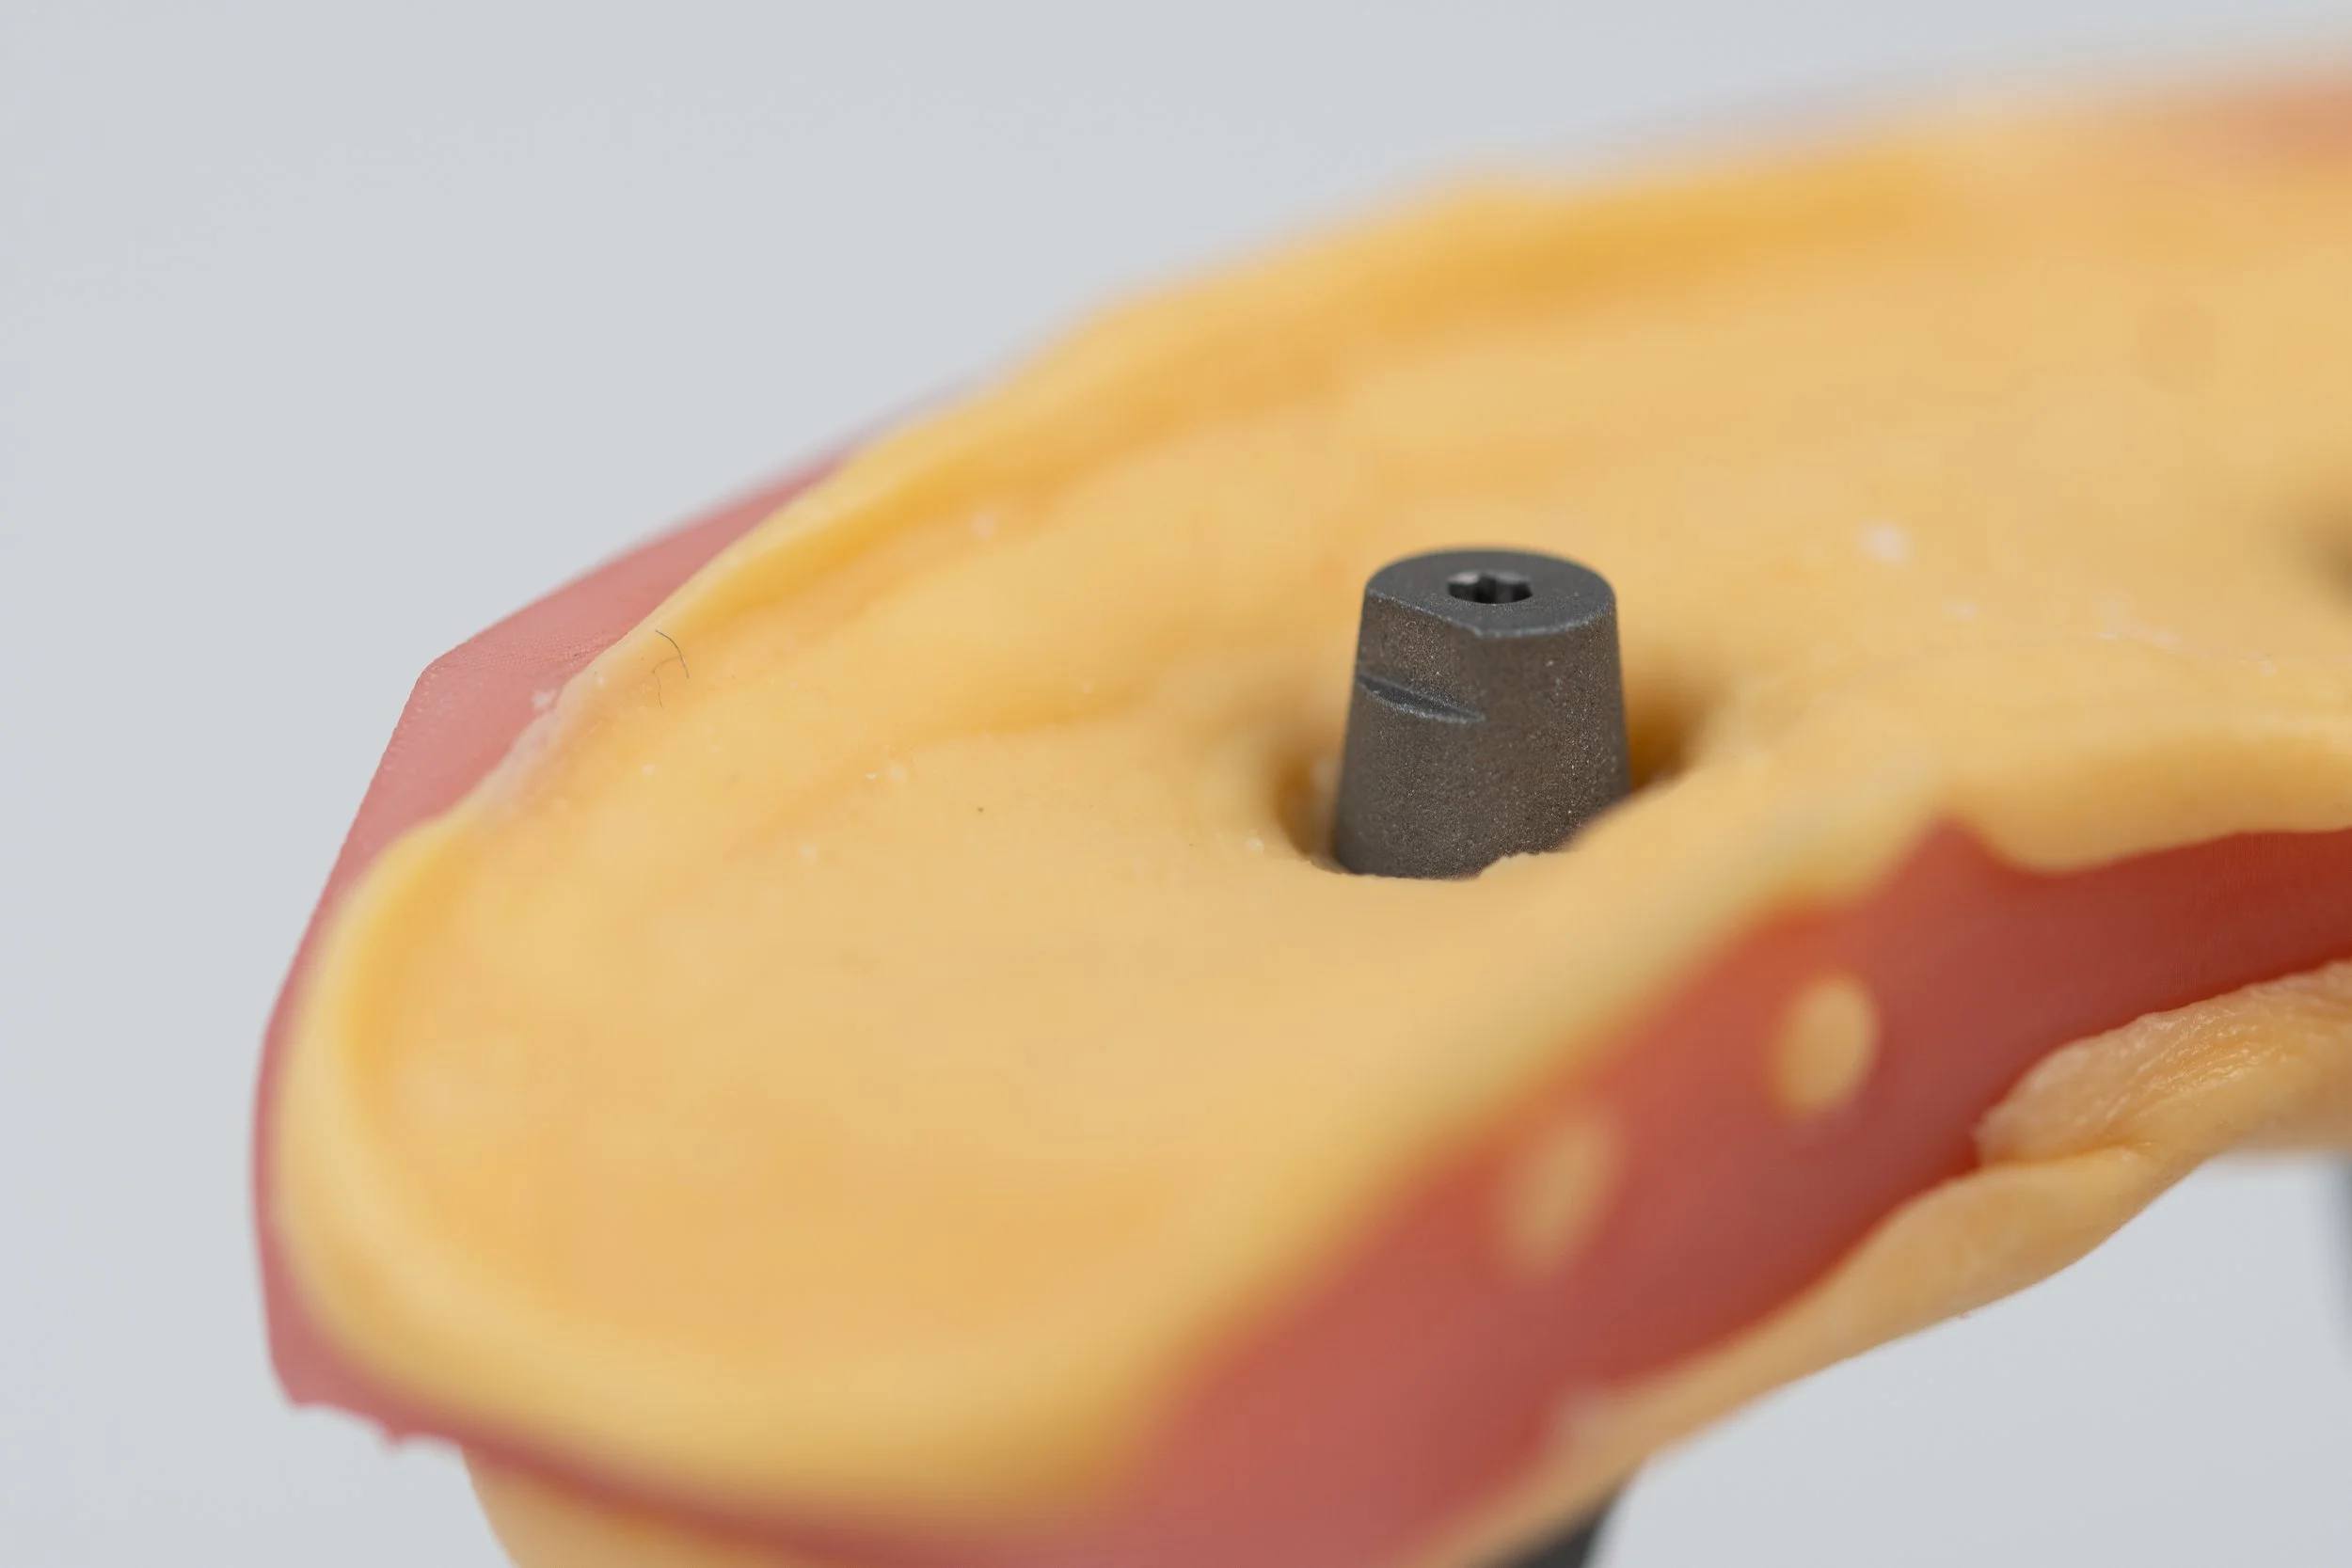
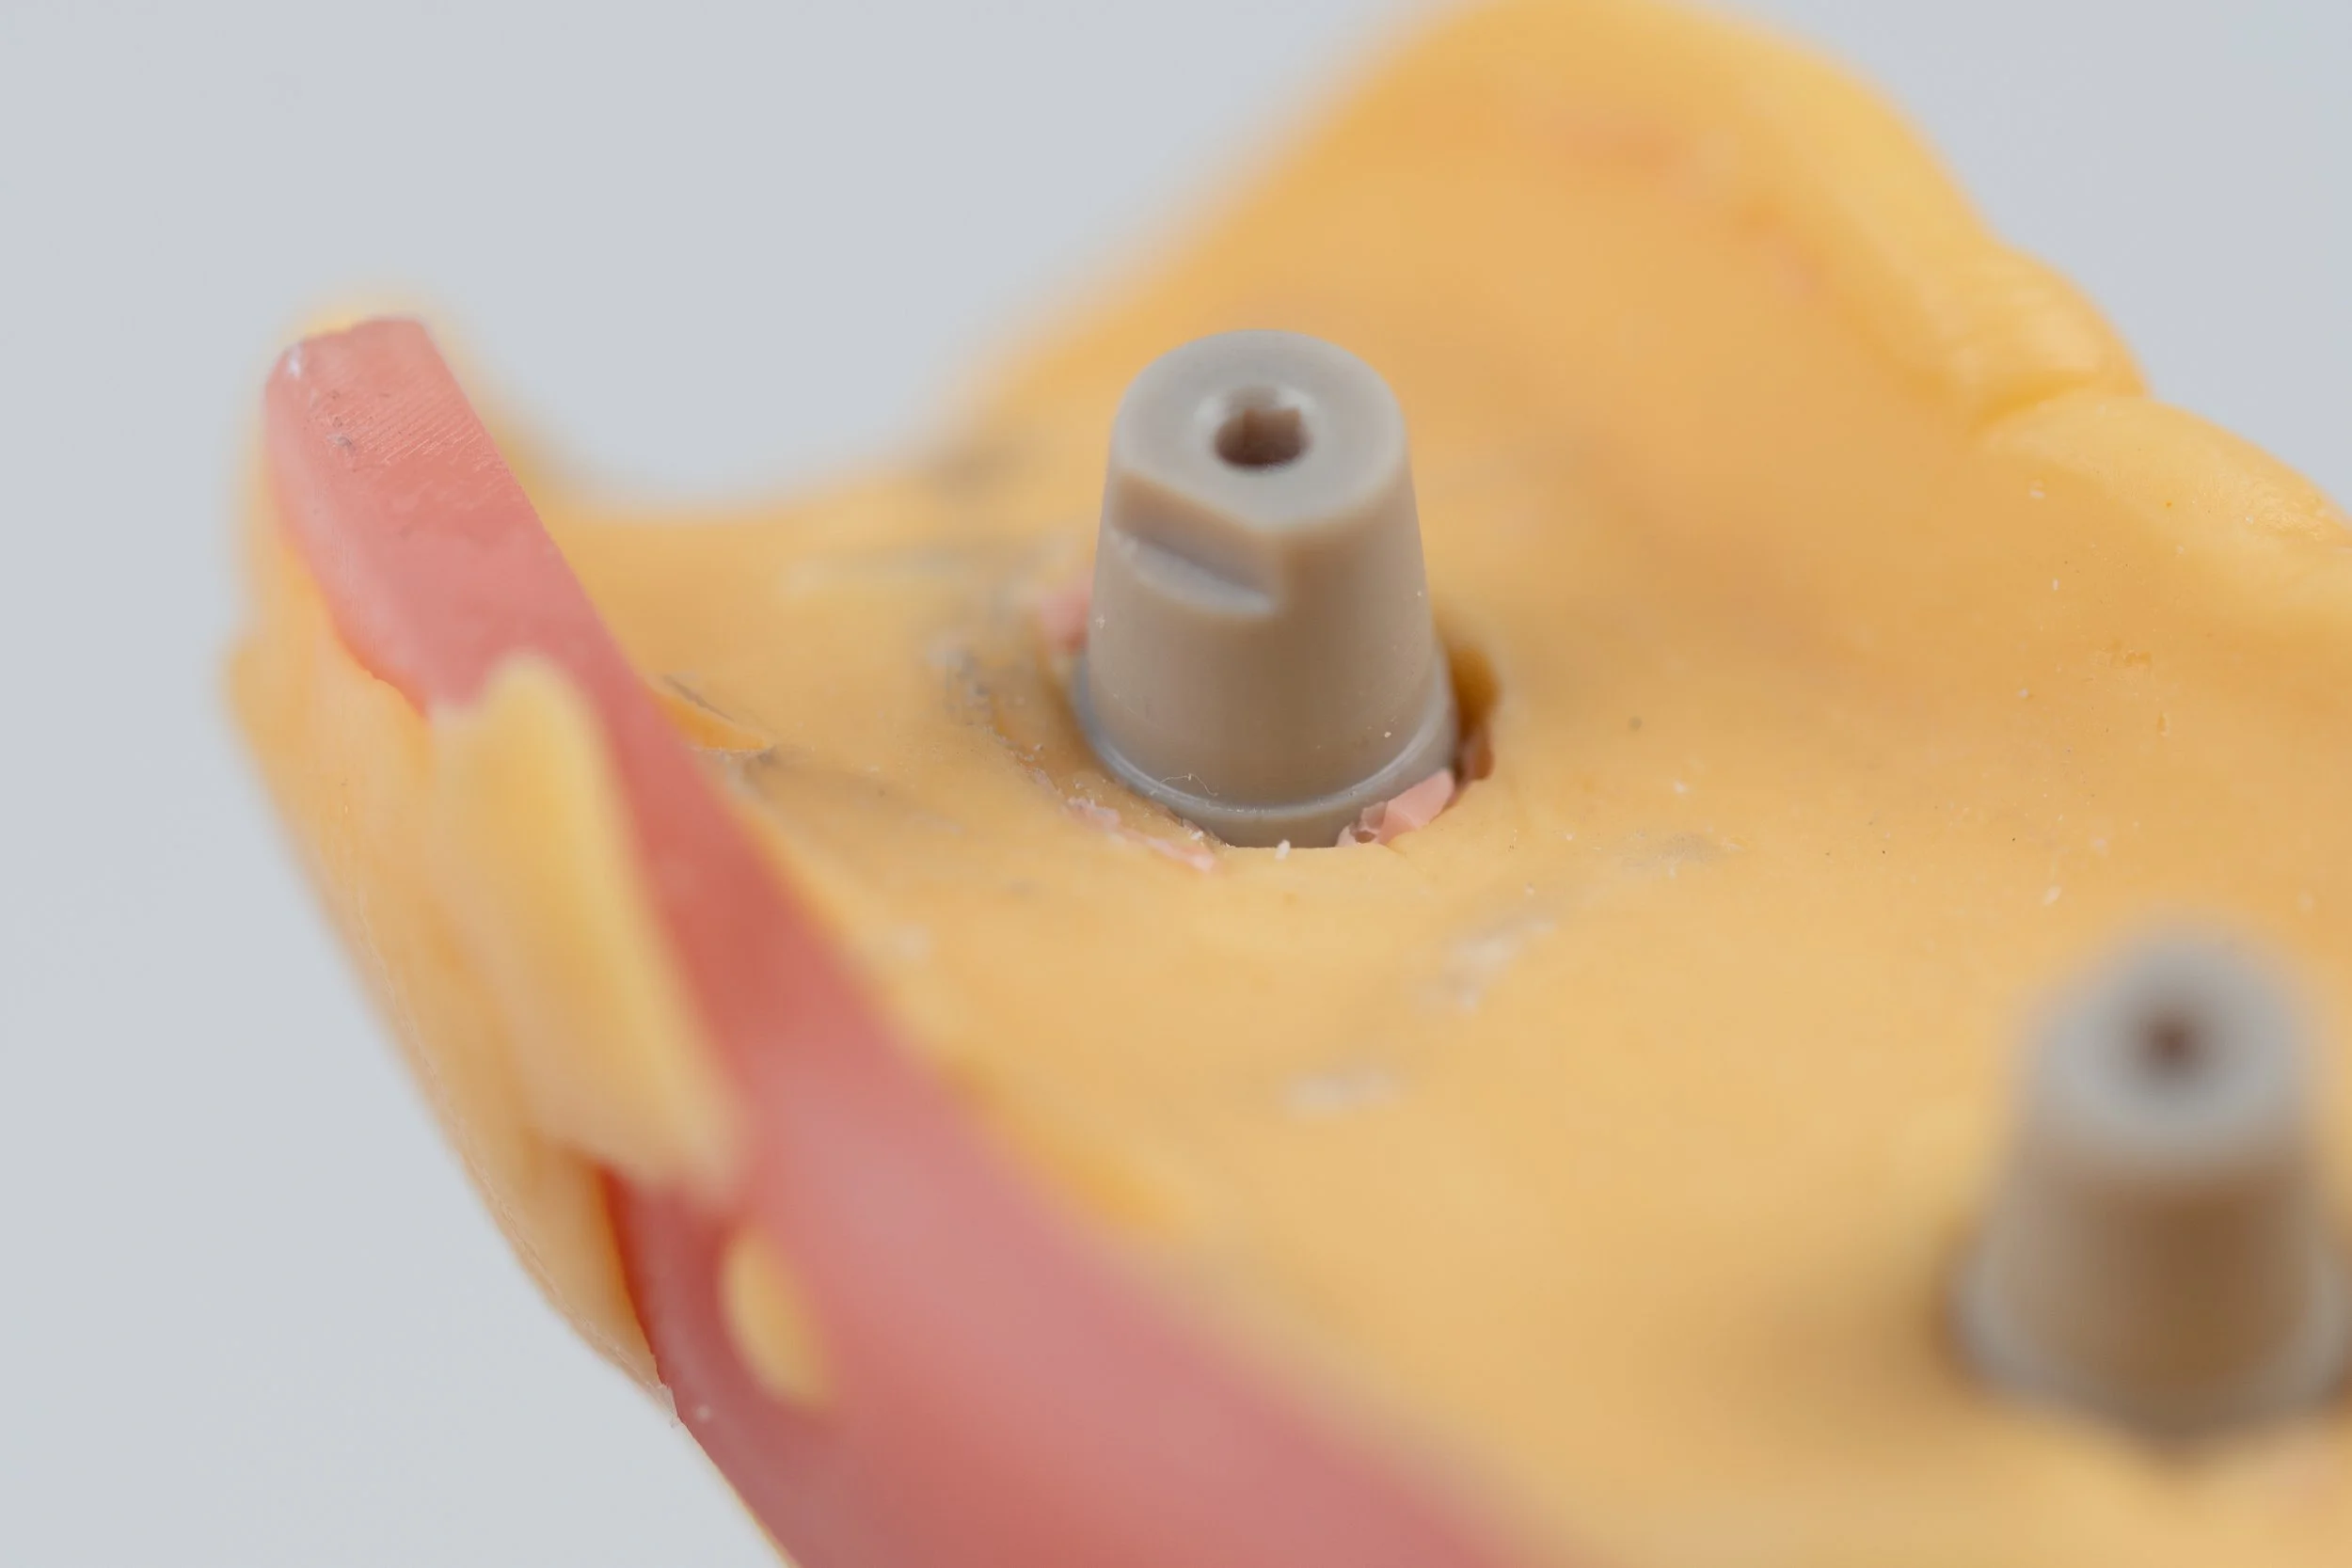
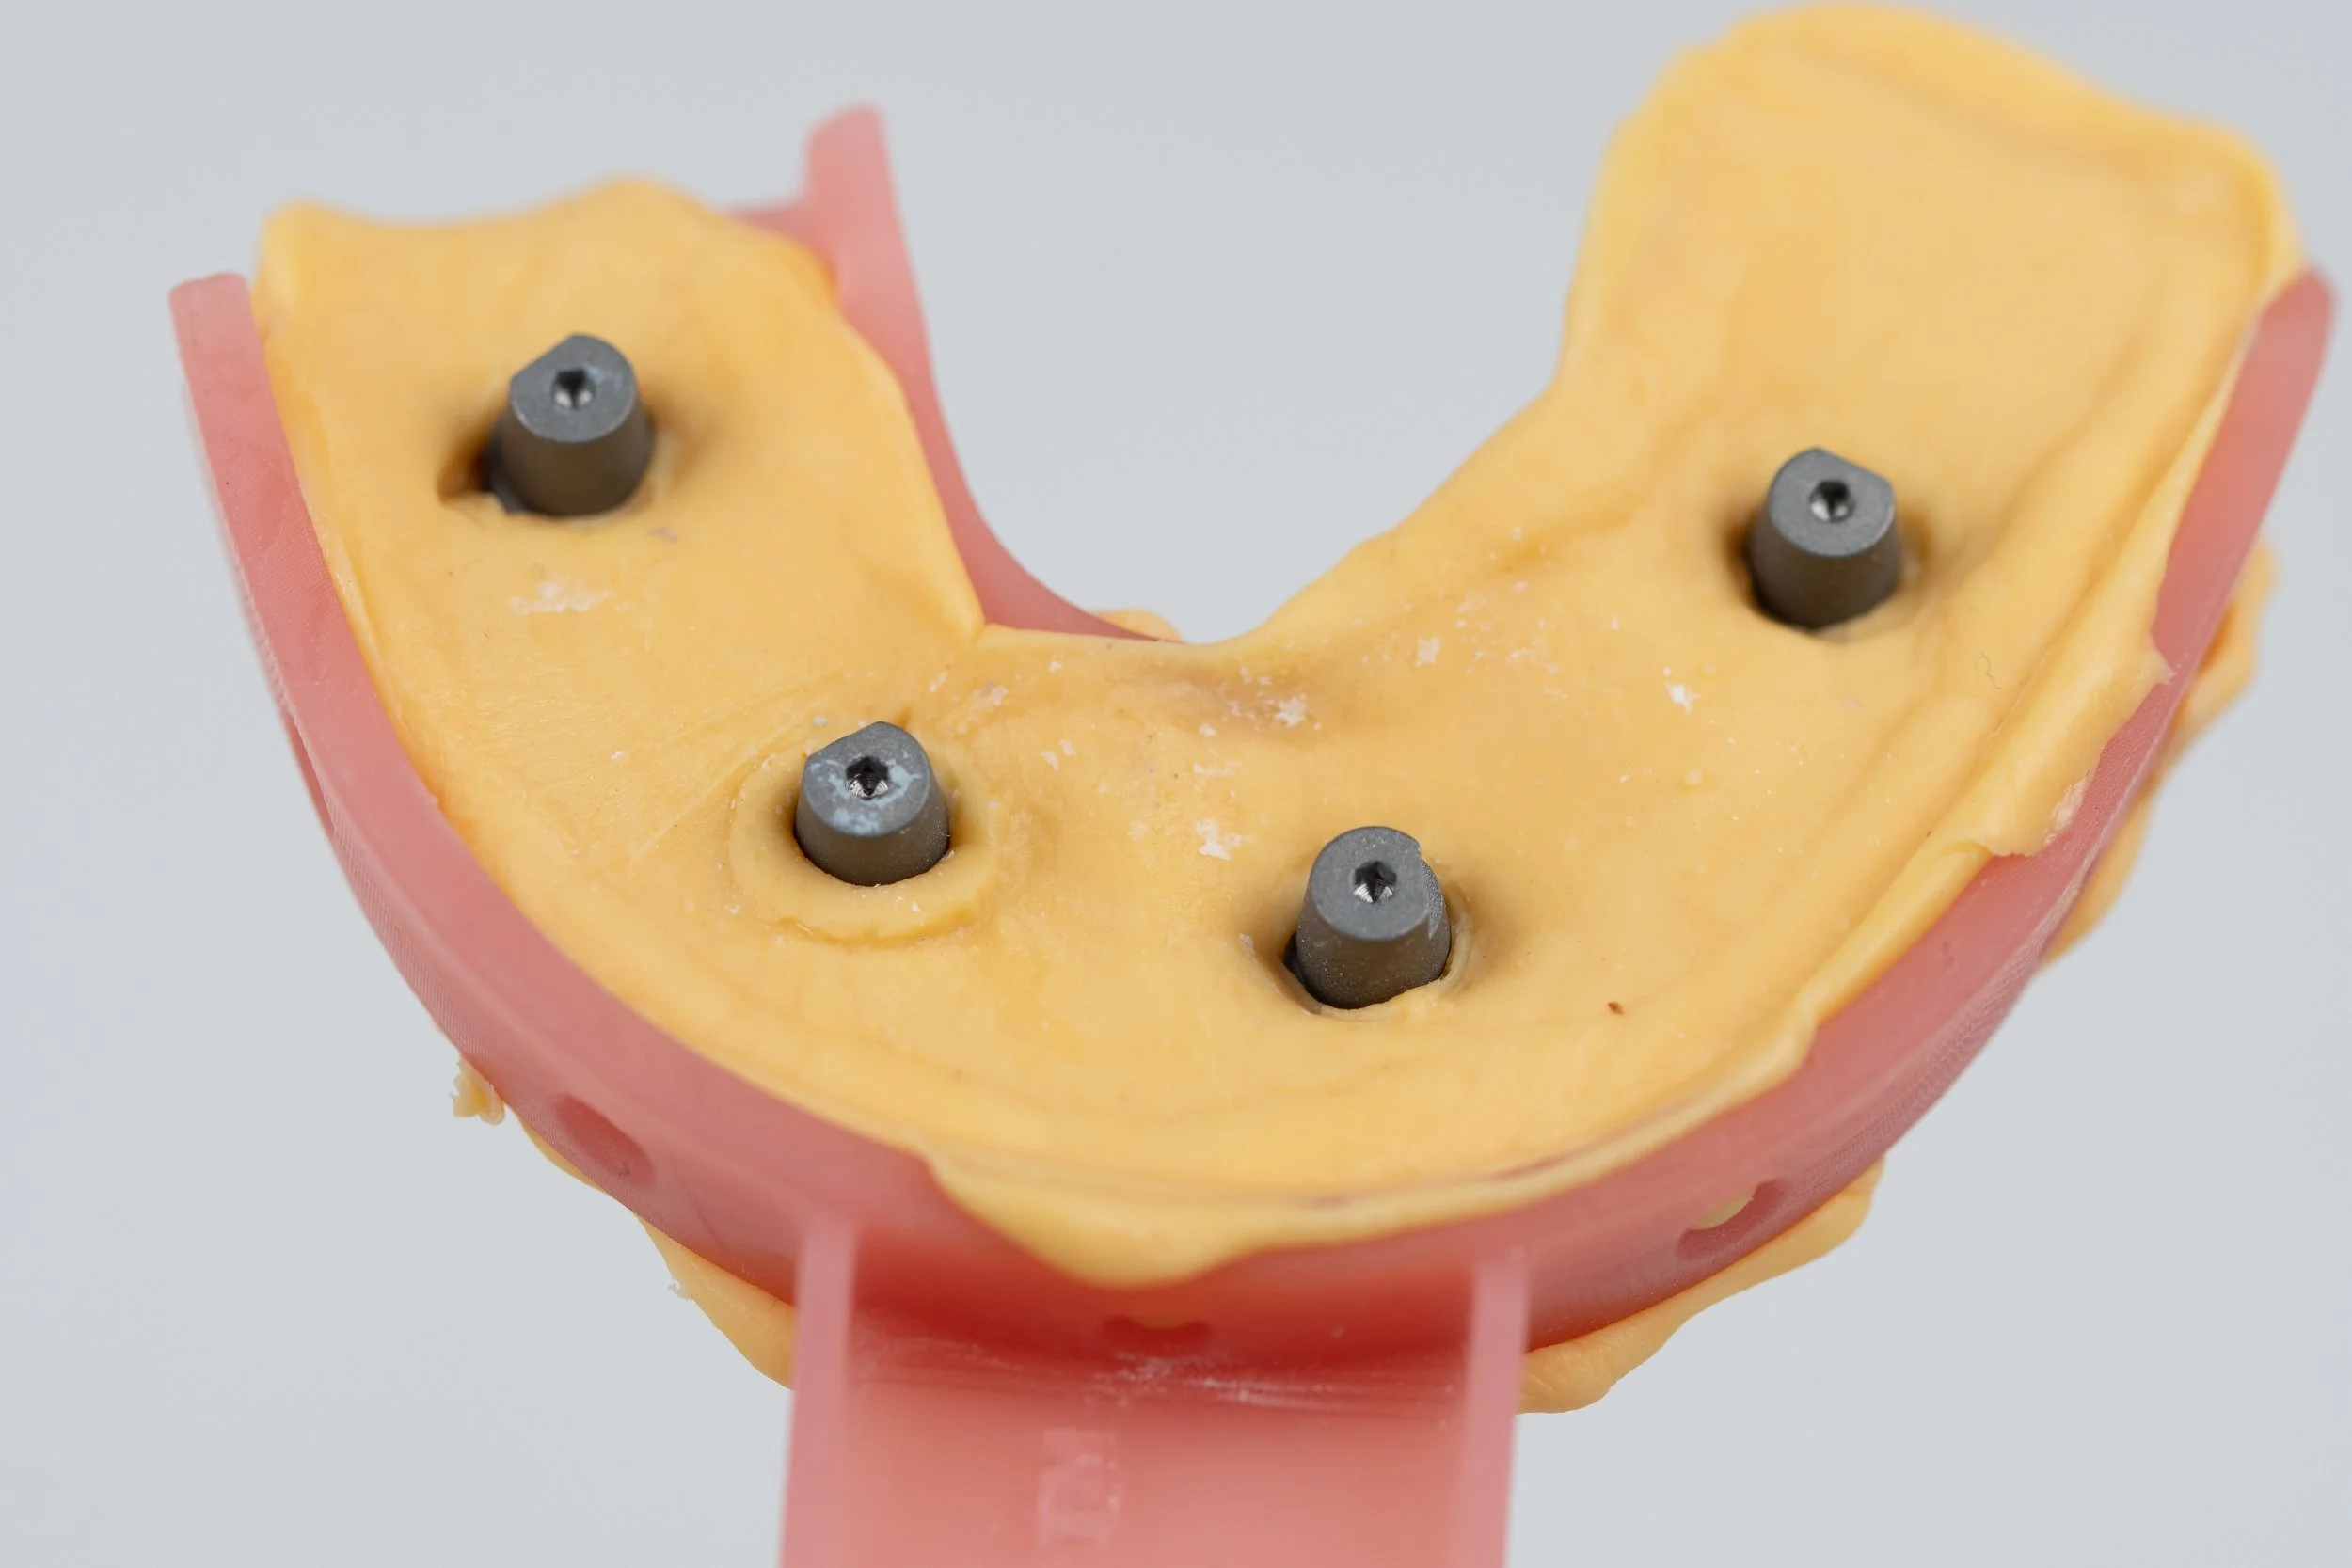
After completing the scanning process for the implant positions in the jaw, the next step is to complete the FI3LDDS Workflow® with the compressed soft tissue scan.
To do this, you need to remove the STV Tray® from the patient's mouth by unscrewing each scan body carefully.
Once you have removed the tray, make sure to remove any blood or debris from the STV Tray® under water to ensure accuracy of scanning.
Next, dry the putty to remove any shiny or reflective surfaces before placing a FI3LDDS Bullet® in each scan buddy and screwing them in place with finger-tight pressure.
Next, scan the putty with your intra-oral scanner capturing the Bullets® and all of the tissue architecture from the tray. Do not forget to scan the sides of the tray which will facilitate the alignment process. Once you are done scanning, verify the accuracy of your scan.
Send all the files, including the implant positions and soft tissue scans to Allure Dental Studio. We highly recommend that you send each file to the lab as you take them. This way the lab will have time to verify that the received scans are accurate.
By following these steps, you can ensure that all necessary scans have been taken accurately, which will enable the dental lab to fabricate the necessary restorations or implants with precision and accuracy.
You do not need to remove the Suture Caps® from the patient's mouth. FI3LDDS Suture Caps® were engineered to facilitate the delivery of the temporary by keeping the tissue away from the MUA/SRA.
Pre-Surgery Data Acquisition | Surgical Data Acquisition | Surgical Temporary Delivery | Restorative Data Acquisition | Final Delivery